Getting started: your first constellation in a few minutes
For the Parafeld™ System Board you only need an up-to-date browser – on a computer, tablet or phone. There is nothing to install and no sign-up. This guide leads from the empty board to the first captured picture.
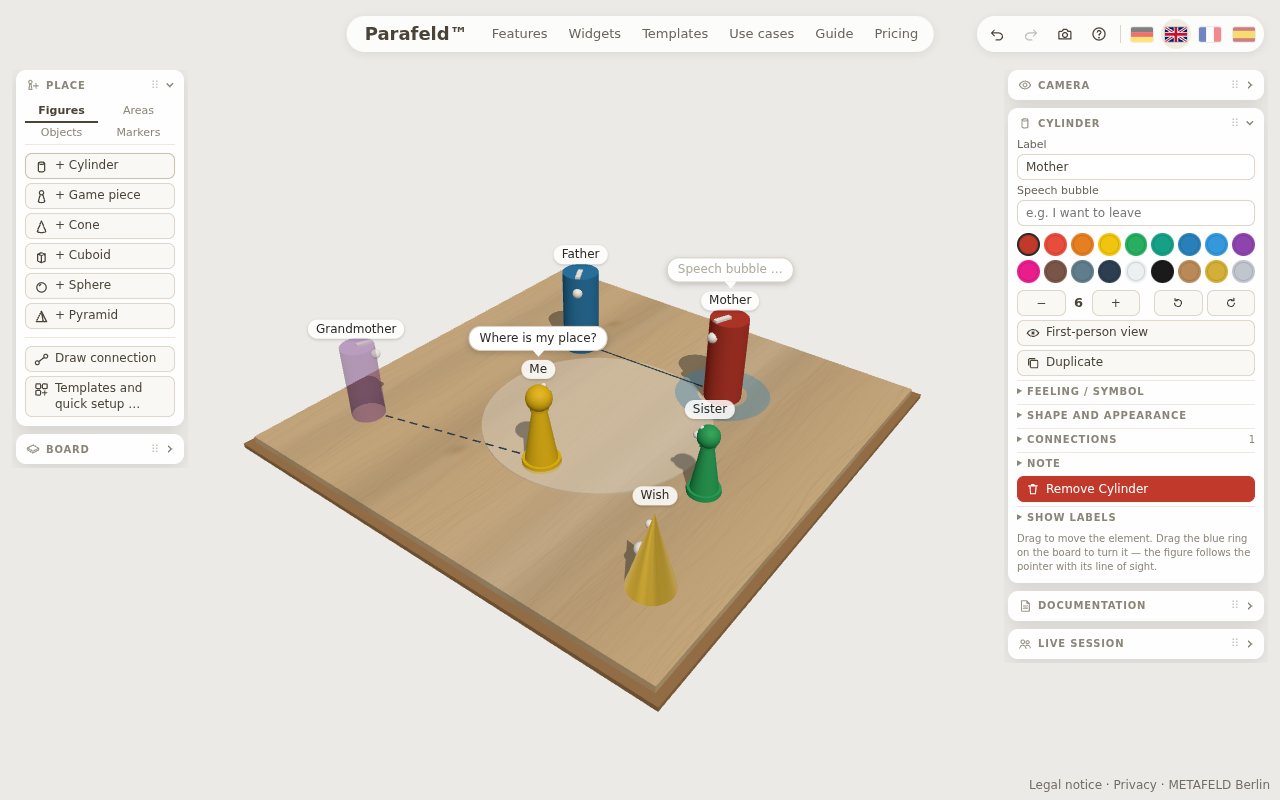
How the interface is laid out
The board lies in the centre. To its left and right are the control panels, the widgets: “Place” and “Board” on the left, “Camera”, “Documentation” and “Live session” on the right. As soon as an element is selected, a widget with its properties appears on the right; it carries the name of the shape, for example “Cylinder”. At the top right are Undo, Redo, Save image and Help. On a phone, the widgets are sheets in a bar at the bottom – the guide Phone and tablet describes this.
Step by step to your first constellation
- Open the board Open parafeld.de/brett. On your first visit, the board is empty.
- Place a figure In the “Place” widget, the “Figures” tab is open. A click on “+ Cylinder” puts a cylinder on a free spot. Each new figure gets its own colour in turn. The Enter key places the last chosen shape once more.
- Name it After placing, the cursor is in the “Label” field of this widget. Type in the name, for example “Me” or “Mother”. Later, a double click on the figure – a double tap on a phone – opens the field again. Below it, a “Speech bubble” can be entered.
- Move it Drag the figure to its place with the mouse. Guide lines align it with the other figures as you go. With the arrow keys, the selected figure moves by one centimetre, with the Shift key held down by five.
- Turn it A blue ring surrounds the selected figure. Dragging the ring turns it – the figure follows the pointer with its line of sight. The nose and notch show where it is looking. The Q and E keys turn it in steps of 15 degrees.
- More figures Place the other people or issues in the same way. You change colour and size in the properties of the selection.
- Change the view In the “Camera” widget, “Bird’s-eye view” shows the picture from above. Select a figure and click “First-person view”: now you see the board through its eyes. “Leave first-person view” takes you back.
- Capture In the “Documentation” widget, enter a title such as “Starting picture” and click “+ capture”. The picture is now saved as a snapshot.
Starting faster: templates and quick setup
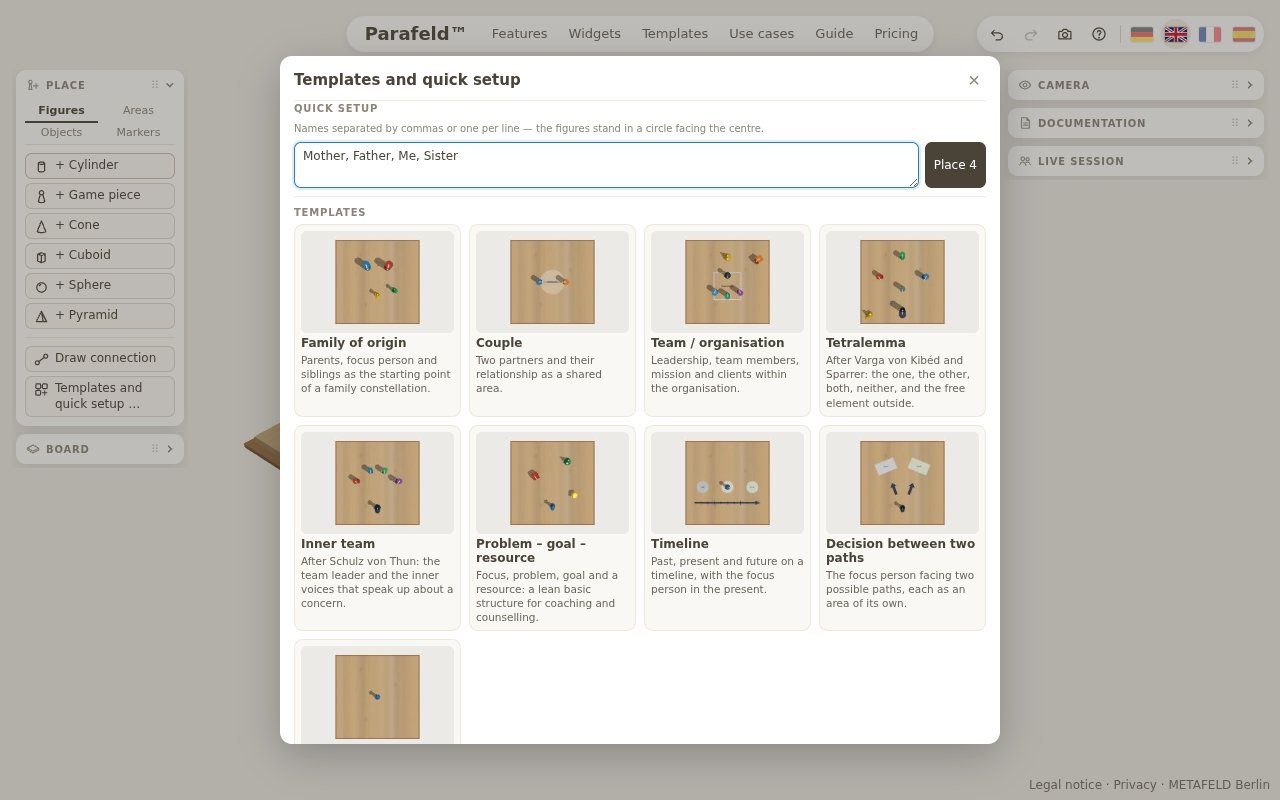
“Templates and quick setup …” in the “Place” widget – or the 5 key – opens a dialog with two ways in. With the quick setup, you type in names, separated by commas or one per line, for example “mother, father, me, sister”. One click places all figures in a circle; they face the centre. Below are nine ready-made templates, from the family of origin to the tetralemma. A board of your own can be stored in the browser with “Save board as template”.
If something goes wrong
Every step can be undone: with “Undo” at the top right or with Ctrl + Z. A right-click on a figure opens a menu with First-person view, Meta position, Label, Fix in place, Duplicate, Draw connection and Remove. “Clear board” in the “Board” widget removes all elements and connections while the documentation is kept; “New constellation” clears the board, documentation and snapshots. Both can be undone.
Saving and sharing
The board saves continuously in the browser of the device. If you close the window, the constellation is back the next time you open it – but only in this browser on this device. In the “Documentation” widget, “Share” offers further ways:
- Export stores the constellation including documentation as a file; “Import” loads it again, also on another computer.
- Scene link copies a link to the current picture, for a colleague, for example. Title, concern, notes and snapshots are not included.
- Image (PNG) saves the current view as an image file.
What else there is besides figures – areas, objects, markers, connections and the board settings – is described under Figures and board. The page Keyboard shortcuts collects all shortcuts for the keyboard.